How to Teach Efficient Pencil Grip
Learning an efficient pencil grip is a key milestone on the child’s path to developing fine motor skills. It builds on the skills they have already developed using other hand-held tools, and it sets them on the path to expressing themselves with words and images.
Acquiring this skill enables young students to write by hand, but it also fosters their cognitive and physical development. Early-years educators need to understand the different pencil grips, how they evolve as the child matures, and how to teach the relevant techniques to master efficient pencil grip and guide students towards academic success and confidence in their abilities.
This article covers the pencil grip types used by children at various stages of their development and offer several strategies, activities, and accommodations with which teachers can make an impact on their students’ educational journey right away.
Through practical advice and guidance, we demonstrate how to teach correct pencil grip and explore ways to encourage and motivate learners along the way.
Pencil grip stages: An overview
From grasping the pencil and moving the entire arm to using only certain fingers for more subtle movements, each milestone is part of a sequence leading towards maturity and marks a significant improvement in a child’s physical and cognitive abilities.
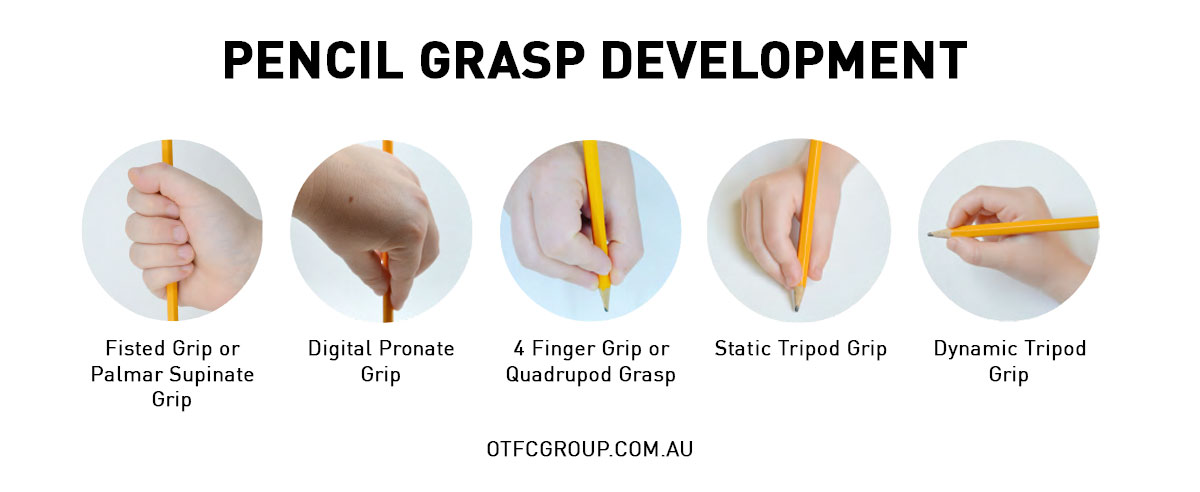
Below are the five main stages of pencil grip development in children.
(Note: children develop at different rates, so be flexible with the timeline suggested below.)
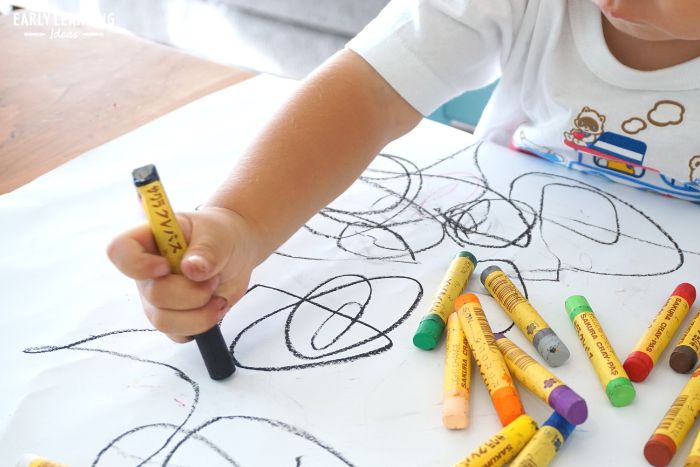
1. Palmar supinate grip (1-2 years old)
The child grasps the pencil with their fist, holding the pencil vertically, and uses their entire arm to scribble, exploring mark-making for the first time.
2. Digital pronate grip (2-3 years old)
The child grasps the pencil with their fingers, with the palm facing down, and moves at the elbow to draw basic shapes like lines and circles.
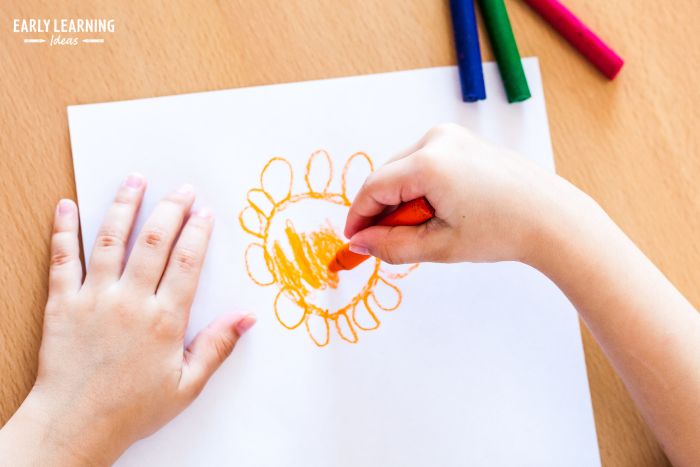
3. Four-finger grip (3-4 years old)
The child grasps the pencil with four fingers and uses controlled movement mostly from the wrist to do more complex drawings like dot-to-dots and simple figures.
4. Static tripod grip (4-6 years old)
The child grasps the pencil with three fingers, with the pencil resting on the middle finger, and the wrist and forearm on the table for more control, beginning to form basic letters and numbers.
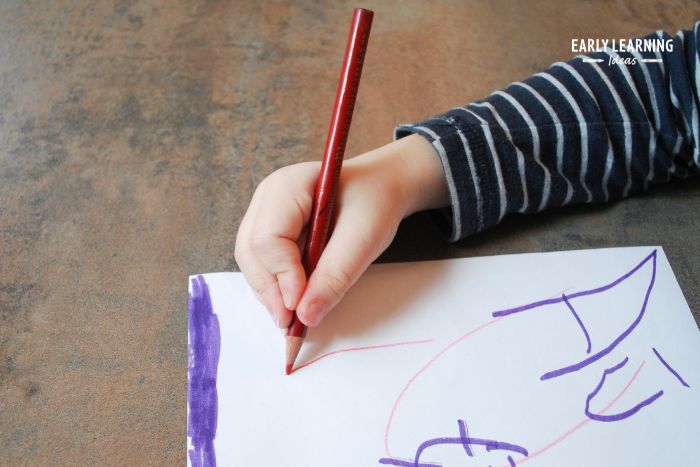
5. Dynamic tripod grip (6-7 years old)
The child grasps the pencil between the thumb and index finger while it rests on the middle finger, with the movement initiated entirely by the thumb and index finger, to draw or write.
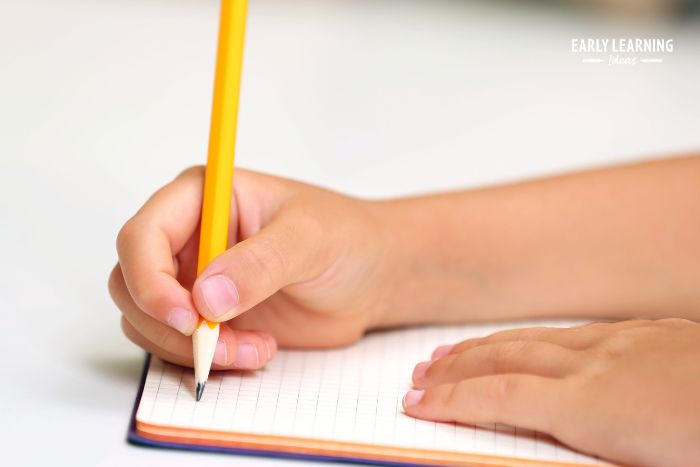
Impact of pencil grip on child development
These milestones are critical not just for children’s ability to express themselves through writing and drawing, but also for their broader motor skill development. As they become more dexterous, they can perform more complex tasks, such as buttoning shirts or using scissors. Engaging in gross motor activities such as crawling, jumping, and climbing help to increase shoulder and arm strength, which in turn positively impacts the fine motor skills required for gripping a pencil.
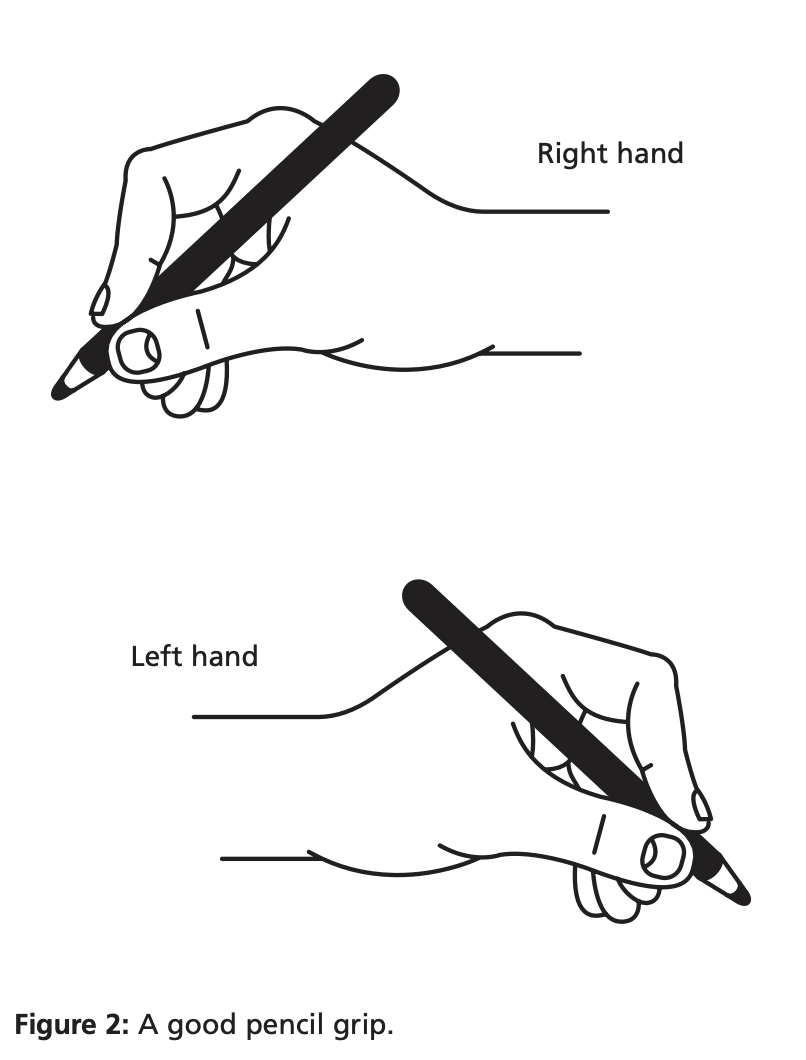
The standard pencil grip
However, there may be variations that work well for some individuals. Other grips can be used by a child as long as they allow for speed, are easily readable and comfortable, and don’t harm the hand’s joints over time.
Special considerations for children
Pencil dimensions
The diameter, thickness, and length of the pencil matter, especially for younger children. A pencil that is too thick may be difficult for small hands to grasp properly, while one that is too thin might encourage a tighter, more strained grip, leading to fatigue and discomfort. Ideally, pencils designed for younger children are shorter and slightly thicker than standard pencils.
Writing aids
Ergonomic writing aids which slip over the pencil can help achieve more stable grips by holding the fingers in place. A triangle pencil grip, for example, naturally encourages writers to adopt the dynamic tripod grip by providing a three-sided shape for the thumb, index, and middle fingers to slot into. You can find more information about the different types of grip aid here.
Left-handed pencil grips
Left-handed writers have to face the page and hold the pencil differently compared to right-handed writers. Angling the paper to the right will help keep the wrist straighter while improving visibility and reducing strain. Specialised tools and writing aids designed with left-handers in mind support them by accommodating the angles and wrist positions that are unique to their style.
Teaching and practising pencil grip for children
This section offers a step-by-step guide on how to teach the dynamic tripod grip to children who have some experience using a pencil and are in the transition phase, which is typically around the age of 5.
Below you will find instructions on how to prepare for, demonstrate, and practise this technique with children, followed by some fun exercises that you can do as a class and suggestions for spotting and addressing common issues children might have with their pencil grip.
1. Prepare: Establishing the right posture and position
The teacher demonstrates to the children how to sit in the chair to make sure that they are sitting comfortably with the right posture to make writing easier.
- The teacher demonstrates and asks children to copy:
- See how my bottom and back are against the chair (to support my back)
- See how my feet are flat on the floor (to stabilise the posture)
- See how my forearms are resting comfortably on the table and shoulders are relaxed
Make sure the table and chair are at the correct height, allowing children’s forearms to be parallel to the table.
2. I do: Holding the pencil
The teacher demonstrates the steps to achieving the dynamic tripod grip to the children.
- Pick up the pencil, about 1-2 cm from the tip, using the thumb and index finger.
- Flick the pencil over and back so that the upper half rests in the web created by the thumb and index finger.
- Hold the pencil between the thumb and index finger, letting it rest on the middle finger.
- Adjust the pencil in your hand and check you have done the following:
- The pencil is held about 1-2 cm from the tip.
- The ring and little fingers are bent and resting comfortably on the table.
- There is a space between the index finger and thumb.
- The wrist is slightly bent back, and the forearm is resting on the table.
3. We do: Holding the pencil
Do the process along with the children and keep demonstrating while moving around the class:
- Quietly assist those children who are having trouble and guide the child to pick up the pencil and adopt the grip, helping them put their fingers into position.
- Call out students who are doing it correctly and praise them; highlight what they are doing to adopt the correct pencil grip to the rest of the class.
4. You do: Holding the pencil
Now ask the children to practice using the grip:
- Provide children with an exercise to copy and free draw.
- Quietly guide any child who has still not learned the basic technique, helping them put their fingers into position.
- Provide an ergonomic pencil grip to aid any child who needs help to keep the fingers in position (see Pencil grip corrections and aids below).
Pencil grip activities and aids
1. Ongoing practice of the pencil grip
Activities to encourage use of pencil grip are short, focused writing or drawing tasks. Make sure to incorporate 3-5 minutes a day for practise, and assign children homework that requires them to use their pencil.
Encourage children’s parents by pointing out to them how their child is going mastering the pencil grip and giving them advice on short drawing and writing they can do with their children and supporting them with their pencil grip.
Fun ways to practise pencil grip use:
- Games which require a pencil, like noughts and crosses and using do-dot books, mazes, and colouring activities.
- Craft and drawing activities using different textures and materials, like finger paints and chalks or doing beading and clay modelling.
- Collaborative drawing: the teacher draws an outline of a person and the children have to add details like eyes and mouth.
2. Pencil grip corrections and aids
Identifying issues with the grip
Make it a habit to regularly check how children are holding their pencils to catch errors early and prevent poor habits from forming.
Keep an eye out for signs that children are struggling with holding their pencils, such as hand tiredness, discomfort, or not wanting to write. Look out for tight grips, thumbs over other fingers, or too much finger movement.
Making corrections to technique
Guide children in adjusting their pencil grip by using clear instructions and showing them, such as moving from a four-finger hold to a three-finger hold.
Encourage children to make small changes one step at a time, like first correcting the thumb position before addressing other fingers.
Using specialised tools and aids
Tools like triangle pencil grips can really help children place their fingers in the correct position.
Evaluate the child’s specific needs when picking out an aid. For left-handed children, select a grip which is specially designed for their way of holding the pencil.
Conclusion
Pencil grip is the foundation of a child’s writing journey and overall development. It is the teacher’s job to understand how pencil grip changes over time and apply targeted strategies to help children use the dynamic tripod grip.
This article explained the milestones that make up this journey, provided practical steps for teaching the dynamic tripod grip, and highlighted the importance of a tailored approach to children.
If you’d like to explore 100’s of other useful resources for teaching English reading & writing skills to Foundation to Year 6 students completely for free – sign up to become a member of Good to Great Schools Australia.

